Monday, October 25, 2010

Sloppy Joes

I've been making these Sloppy Joe's since I was about twelve years old.  I was give a kid's cook book and the recipe started to evolve from one that had been printed inside titled, "Not So Sloppy Joes."  Well, over the years, I have created my own special blend and while it's not really an exact recipe I can share, I thought I would try. 

You start, or course, with ground beef.  Last night I was cooking for eight so I had three and a half pounds to work with.


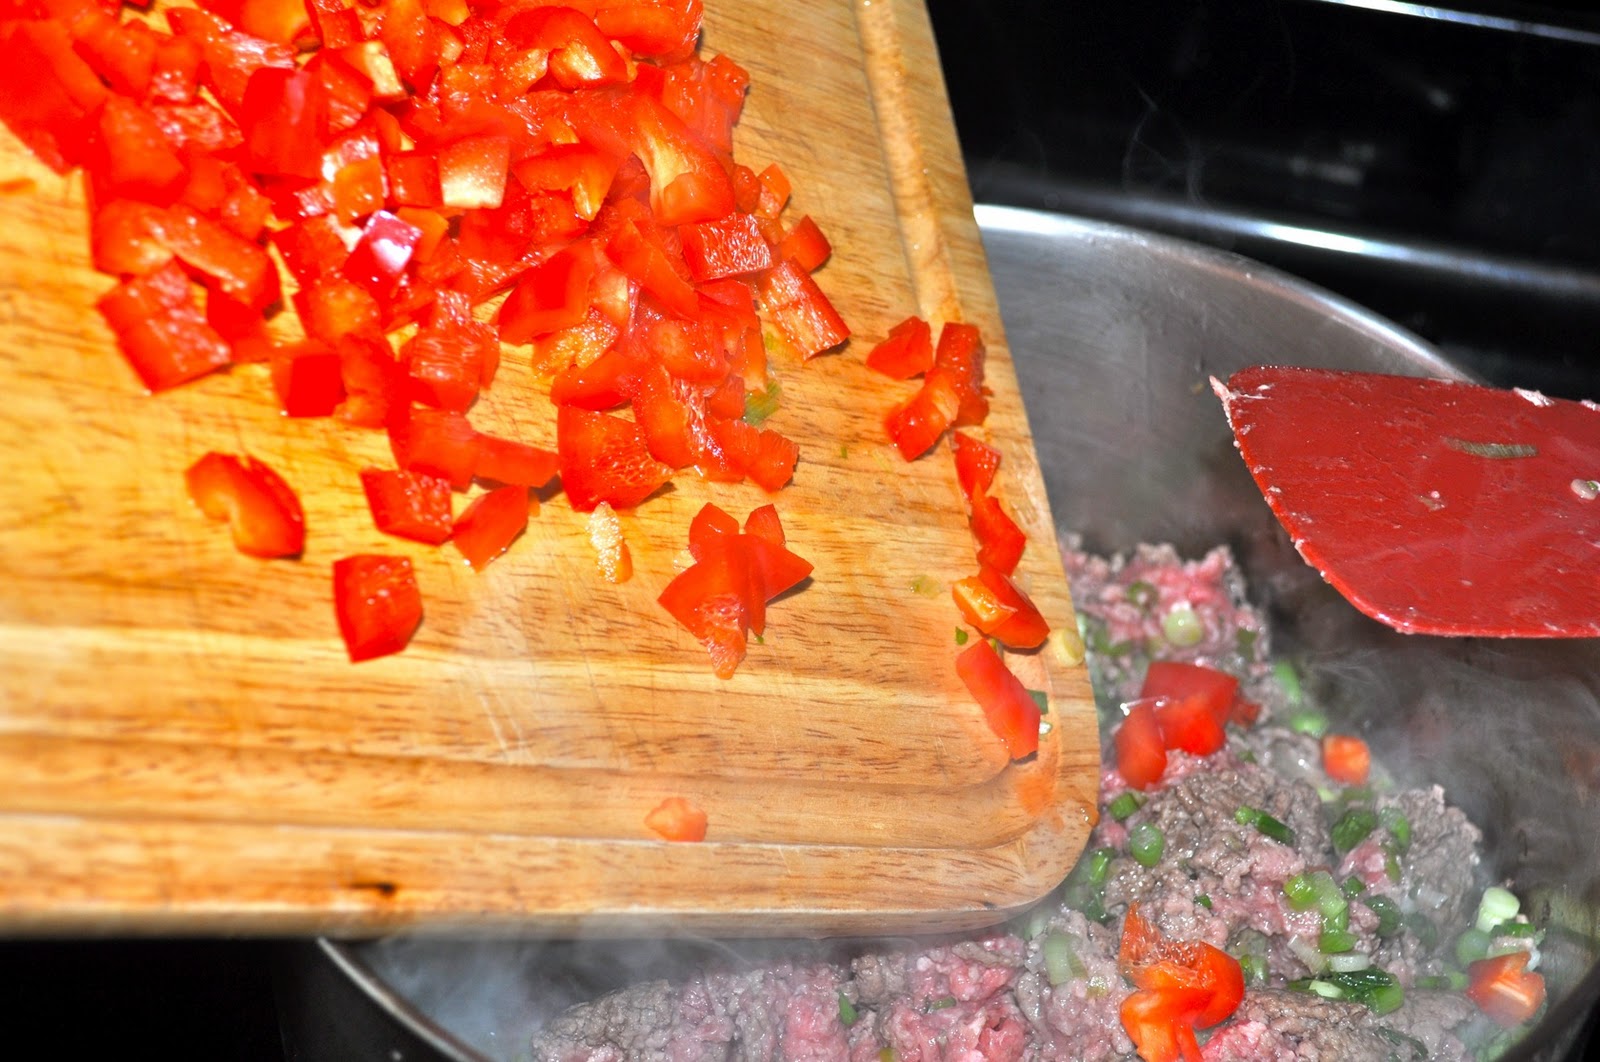
You want to sear the meat but not cook it all the way through.  While you're searing it, go ahead and throw in some green onions and whatever color bell pepper you'd like.  I didn't really understand the workings of green onions as a child so I use a lot of the white bulb part at the bottom and about half way up the green stalk.  Is this the correct way to cook with green onions?  Who knows; it's just what I do.  Last night I used a whole red pepper and half of a yellow pepper I had sitting in the fridge.


Excellent!  Now you're ready to start seasoning.  The bulk of what I use to season is ketchup, yellow mustard, and water.  Very simple, I know, but that's what the kid's cook book instructed me to do.  Actually, they just tell you to only use ketchup and mustard (hence the not so sloppy) and my grammy suggested I add some water to loosen it up making these very sloppy. 


I buy cheap ketchup because my palette is not discerning enough to distinguish between Heinz and Best brand.  I squeeze in a whole lot of ketchup, swirl around some mustard, and add some where between a quarter to a half cup of water depending on the amount of Joe's I'm making.  The ketchup to mustard ratio is about 3/4 to a 1/4 respectively. 

I also like to add in, salt, pepper, cayenne, and garlic powder.  You can add these things or whatever else you like to your specific tastes.  It should look something like this when you're done adding to it.


Looks kind of like chili, no?  Once it tastes how you like it, you let is simmer for awhile.  I say for at least 30 minutes but you can let it bubble on a low hear setting for as long as you'd like; it lets the flavors seep in that way. 

Last but not least you're going to want to eat that yummy, sloppy, goodness!  I serve mine on a white bun with a side of Lay's to scoop up what you're bun drops, and a cold dill pickle.  It's the perfect meal for anytime of year.  It's reminiscent of a backyard bbq in the summer time but it also warms you up with it's comfort food quality in the winter.

Tuesday, October 19, 2010

I Love a Good Headpiece


..and I acquired three new ones this weekend.  One mom bought me, one Nate surprised me with, and one I purchased myself.  They all have something in common; each one was hand made.  Not by my hands, but hand made none the less. 

Purchased from Fifi Mahoney's, this baby is being donned on both Halloween and Mardi Gras.
So pretty and purchased at the always fabulous Ragin' Daisy.

I don't have a picture of the feathery Saint's clip Nate bought me but it will be on my head everyday that the Saint's play.

Sunday, October 10, 2010

It's My Favorite Time of Year Again!!


And might I say, my decorations are even better than last year!  Check out that twelve foot hanging ghoul I purchased from Walgreens.  
FABULOUS!!

Thursday, October 7, 2010

HOT WINGS

So I assume anyone who reads my blog knows that I'm engaged and now must start working on shedding some poundage before my wedding which is SO HARD because I L.O.V.E. to eat.  Especially wings.  I love love love chicken wings; super spicy, and smothered in blue cheese.  I'm on day four of my diet so it's pretty much killing me to look at these pictures, but for my last fatty supper I made hot wings and I wanted to share how.  I know it's not really crafting, but it is creating and I love to cook so I'll be sharing recipes from time to time.

They're super easy, all you need are the wings, Frank's red hot original, butter, Tabasco, and canola oil!

First you get dat erl nice and hot and about 1.5 to 2 inches deep in your skillet.  Then you drop in the wings and let em start to cook:


Don't they look delectable?  I think so too!  While the chicken is frying you can make your wing sauce.  Because Nate is offshore, Ern was at work, and Mez was still asleep, I was cooking for one so I made a half batch of sauce.  One stick of butter, melted, about half the bottle of Frank's, and about 15 shakes of Tabasco.  I like my food super spicy so maybe you don't even need any Tabasco.  Shake to your liking.  For a double batch, two sticks of butter and the whole bottle of Frank's.


MMMMMMMMMMMMMMMMMMMM.  You have to let the wings fry for about 25 minutes.  You want the skin nice and crispy.  Also, you've got to keep moving them around in the pan so they don't stick to the bottom.

Once they start to look like this, you know they're getting close!


When your chicken is cooked you can take them out with some tongs and dip 'em in the sauce.  Then I like to pour the extra sauce all over them.  Like so...


My heart is a flutter!  You can even see the steam rising off of those babies!  Serve with a big helping of your favorite, chunky blue cheese dressing (or with with Ranch if you can't handle the awesomeness that is blue cheese) and enjoy.

Wednesday, October 6, 2010

Freret Market

This was my first arts market and it was excellent!  I had signed up before but canceled my spot at the last minute because I didn't have a pop up tent and I didn't have enough inventory.  But this was it; I had built up a respectable amount of merchandise and I had found my pop up tent for a fabulously low price at Rite Aid of all places.

I was selling hand stitched, one of a kind, and made out of recycled fabric voodoo dolls.  They were a hit.


A while back, I made my friend Adele, an "ABCD" piece for her beautiful baby Phoebe's nursery.  Everyone loved it and suggested I sell them.  So I made some example pieces, for display purposes only, and had them available by custom order. 

(They spell out "Who Dat" and "ABC's")


I was also selling some of my skeleton ladies that I usually sell at Sarita's Grill on Freret.  They're so colorful and fun and it is October so I felt it was only appropriate.


The LASPCA is always out trying to find puppies homes.  We fell in love with this guy and Ern was trying her hardest to adopt him.  We got to take him home with us, but as it turns out, she was highly allergic to him.  He's still up for adoption, and just about the coolest little guy, ever.


It was a fun day.  I didn't sell as much as I would have liked to but I got a good feel for what people were looking to buy.  I'll be out with a different inventory on November 6th.  Come say hello if you're out enjoying the amazing weather we'll be enjoying for the next few months.

Around the Work Place

A co-worker suggested I start a DIY blog when she saw what I had done to spruce up the store I manage.  I said, well everything's already been done, but I supposed I could show it off.  So here it is, my first post. 

I manage Corks N Canvas's Metairie location.  When I took over it was sterile and the only fun decorations were the paintings we have hanging all over our walls.  So I made this clock:


I bought the clock itself from World Market (I wasn't about to try and figure out how to do the electronics) and the rest is really just paint.  Acrylic on the face and sealed with a spray lacquer and the hands were painted with a sign painter's paint known as One Shot.  I L-O-V-E One Shot.

I also made this cork board. 


So many beautiful corks.


I had been saving up corks for about a year; hoarding them every time a customer left one out on a table or tried to throw one away.  This baby is 4.5 x 3 feet.  It's huge and amazing.  I built the frame out of plywood and one by two's and painted it in our signature red color.  Then I used this fantastic glue called "Weldbond" to hold all those corks in place.  I lost count while I was gluing them in but I guesstimate about 2,000 total. 

Then there are these tables.


I didn't actually make them so much as re purpose them.  The bigger one that houses the stereo was here and the tiny one under the vases I found at TJ Maxx.  Oh and I also found these fabulous vases at TJ's as well.  Only $15.99 each, such a steal!  They both just got slapped with some acrylic and spray lacquer.

Same goes for this check in sign...


Apparently it was very confusing as to where one would need to check in.  Clarification in a cute way.
And what about this face in hole board?


I don't know what you would actually call this, but face in hole board wors for me.  I didn't actually do any heavy labor on this.  That was all, Nate so you'd have to discuss building plans with him.  I did however, paint the facade.  

Last but not least there's my open and closed sign.  


An old fashioned palette bought from my local art shop.  Painted the lettering, made it look like a palette in use, drilled some holes, and added ribbon.  

Well, that's that.  I think I did a pretty spiffy job considering I'm still working on navigating blogspot!